Setting Up Selenium Grid

In this post, we'll walk you through step-by-step on how to set up Selenium Grid 4, so you can start running your Selenium tests faster and more efficiently. So, let's get started!
To get started with Selenium Grid 4, the first step is to download the latest version of Selenium 4, which is currently 4.8.3. You can easily download it from the official Selenium website.
Selenium Grid 4 offers various modes of setup, including:
- Standalone
- Hub and Node
- Distributed
- Docker
Step 1:
Install Java Development Kit (JDK) Before you can set up Selenium Grid 4, you'll need to ensure that you have the latest version of JDK installed on your system. You can download and install the latest version of JDK from the Oracle website.
Step 2:
Download Selenium Grid 4 Next, you'll need to download the Selenium Grid 4 JAR file from the official Selenium website. You can choose to download either the standalone version or the bundled version, depending on your requirements.
Step 3:
Start the Selenium Grid 4 hub To start the Selenium Grid 4 hub, open a command prompt or terminal window, navigate to the directory where you downloaded the Selenium Grid 4 JAR file, and enter the following command:
java -jar selenium-server-standalone.jar hubThis will start the hub on the default port 4444.
Step 4:
Start the Selenium Grid 4 nodes To start the nodes, you'll need to open a new command prompt or terminal window for each node, navigate to the directory where you downloaded the Selenium Grid 4 JAR file, and enter the following command:
java -jar selenium-server-standalone.jar node --hub http://localhost:4444This command will start the node and connect it to the hub on the default port 4444.
Step 5(Optional):
Configuring nodes: When initializing nodes for testing, the default configuration allows for concurrent use of up to 11 browsers, including 5 Firefox, 5 Chrome, and 1 Internet Explorer. Additionally, testers can run a maximum of 5 simultaneous tests by default.
Testers have the flexibility to modify these default settings and other browser configurations by configuring each node. This can be done by providing parameters for each -browser switch that corresponds to a node.
Whenever the -browser parameter is used, the default browser settings are disregarded, and only the specified command line parameters are implemented.
For example, to configure 4 Chrome version 4 nodes on a Windows machine, you can use the following command:
-browser browserName=chrome,version=4,maxInstances=4,platform=WINDOWSIn a scenario where a machine has multiple versions of Firefox, you can map the location of each binary to the compatible version on the same machine. For instance, if a machine has versions 3.6 and 4 of Firefox, with 5 and 4 instances required for each version, respectively, the following command can be used:
-browser browserName=firefox,version=3.6,firefox_binary=/home/myhomedir/firefox36/firefox,maxInstances=5,platform=WINDOWS -browser browserName=firefox,version=4,firefox_binary=/home/myhomedir/firefox4/firefox,maxInstances=4,platform=WINDOWSThis way, testers can customize the nodes according to their cross-browser testing requirements, choosing the desired combinations of browsers, their versions, and operating systems without any restrictions.
Step 6:
Verify the Selenium Grid 4 setup To verify that the Selenium Grid 4 setup is working correctly, you can open a web browser and navigate to the following URL:
http://localhost:4444/grid/console
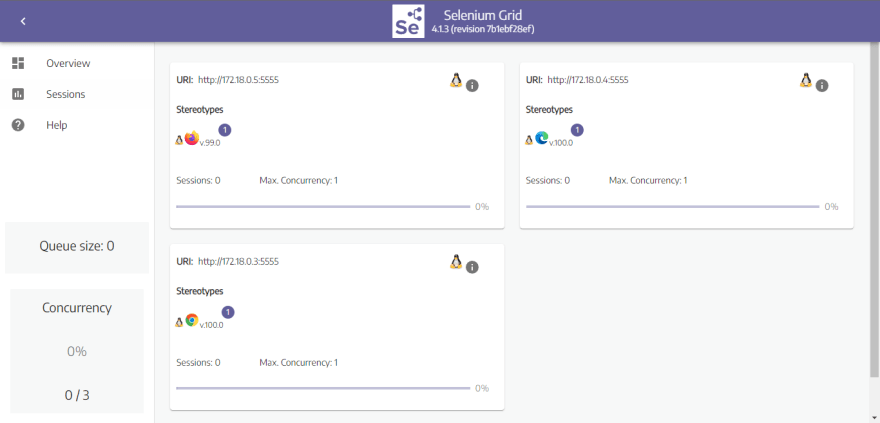
This will open the Selenium Grid 4 console, where you can see the status of the hub and the connected nodes.
Consol will look like this (the number of nodes would be as per our installation guide, which is One, in this case):
Congratulations! You have successfully set up Selenium Grid 4 and can now start running your Selenium tests more efficiently and effectively.
But wait, there's more! Here are some additional tips to help you get the most out of your Selenium Grid 4 setup:
- Use custom capabilities to configure your nodes for specific test requirements.
- Consider using Docker containers for easy deployment and management of test environments.
- Use a load balancer to distribute tests across multiple nodes for even faster test execution times.
I hope this interactive guide has been helpful in getting you started with Selenium Grid 4. Happy testing! In our next post, let us understand in detail how to run Selenium tests on our setup.
